
Welcome to the eighth day of our Burlap Brights Block Hop! We hope you'll enjoy the eleven block tutorials our designing friends are sharing here this week and last week. Be sure to stop by each day to see a new block and have a chance to win some Burlap Brights for yourself!

Today, Julie Cefalu from The Crafty Quilter is sharing a block made using Flying Geese in all six of the rainbow colors. Check out her tutorial and then head over to her blog to enter for a chance to win a fat quarter bundle of the six Burlap Brights prints featured in our hop.
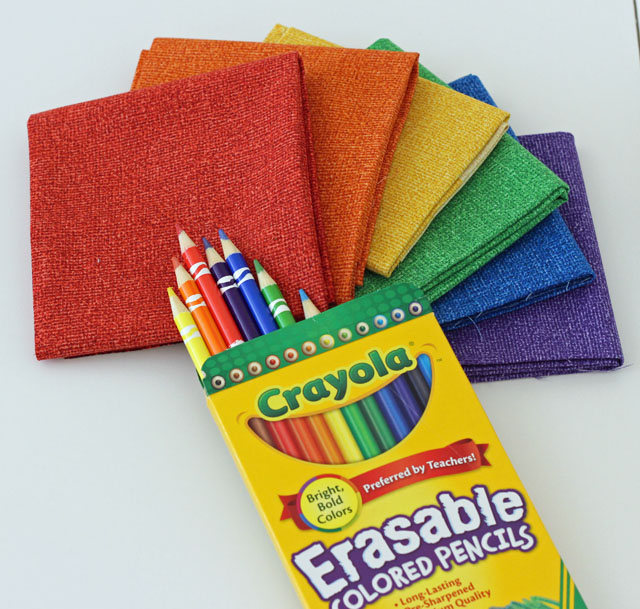
Hey everyone! My name is Julie Cefalu from The Crafty Quilter blog, and not only do I get to teach and work in a quilt shop, I also get to share my creativity online to a much larger audience. I have lots of tips and tutorials that I share on my blog, and I hope you'll visit me there! I am so glad to be participating in the Burlap Brights Block Hop! I'm a fan of burlap, but I'm even more of a fan of the texture and color of these fabrics from Benartex. There is just the right amount of texture and "feel" to these solids and their color is beautifully saturated. When I received my fat quarter bundle of fabric, I felt like I was opening up a box of crayons!
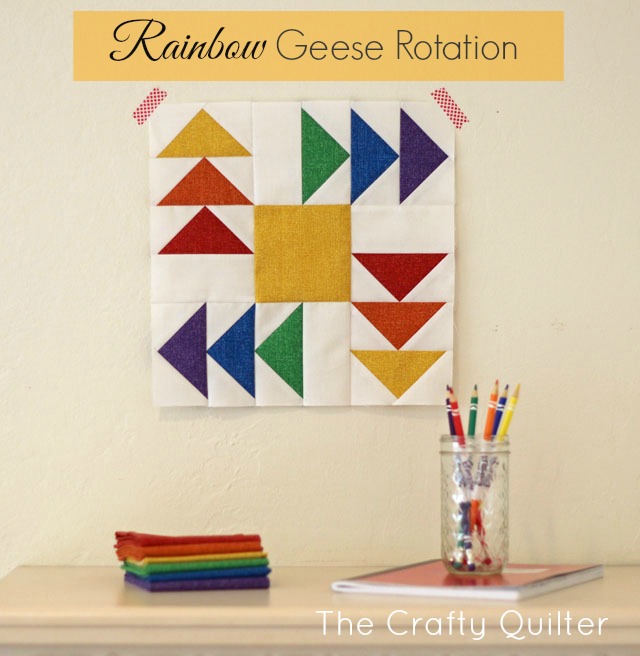
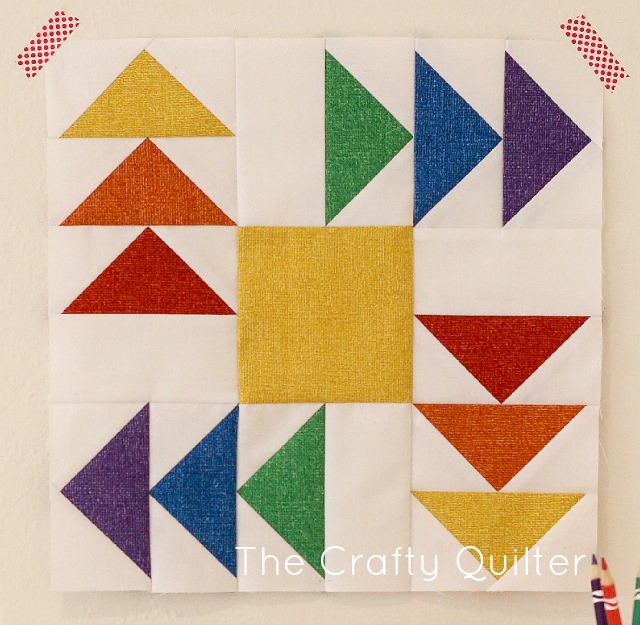
I named my block Rainbow Geese Rotation. I really wanted to use all six of the colors that were provided, and I'm so happy with the design I came up with. It's fairly simple, but the colors make is seem more complex. A little rainbow pizazz in your geese!
NOTE: The cutting instructions, below, are for making over-sized flying geese units. For this tutorial, I have used a Bloc Loc ruler to trim down the flying geese units. You can also use a square ruler to trim them down. If you prefer, you can cut your pieces to the standard size as follows: for each flying geese unit you need (1) 2 1/2" x 4 1/2" colored rectangle and (2) 2 1/2" squares of white. The piecing technique is exactly the same.
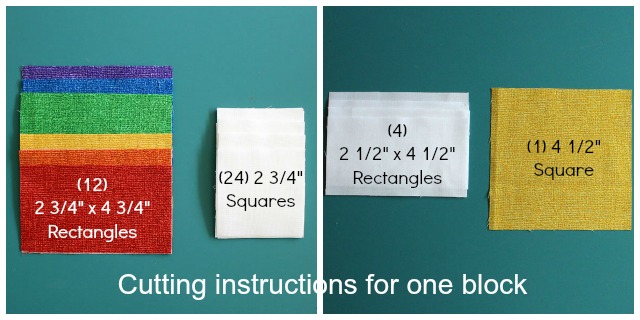
Here's what you need to make one 12 1/2" (unfinished) block:
Fabric and cutting instructions:
- White: (4) 2 1/2" x 4 1/2" rectangles, (24) 2 3/4" squares
- Yellow: (1) 4 1/2" square, (2) 2 3/4" x 4 3/4" rectangles
- Orange: (2) 2 3/4" x 4 3/4" rectangles
- Red: (2) 2 3/4" x 4 3/4" rectangles
- Purple: (2) 2 3/4" x 4 3/4" rectangles
- Blue: (2) 2 3/4" x 4 3/4" rectangles
- Green: (2) 2 3/4" x 4 3/4" rectangles
Construction:
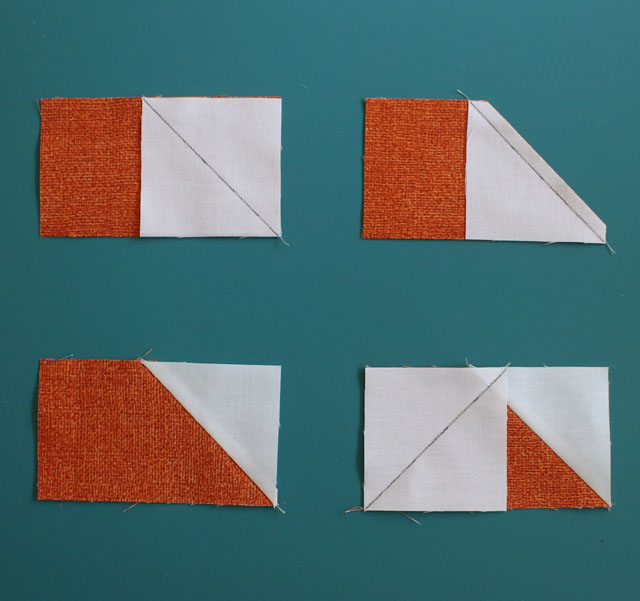
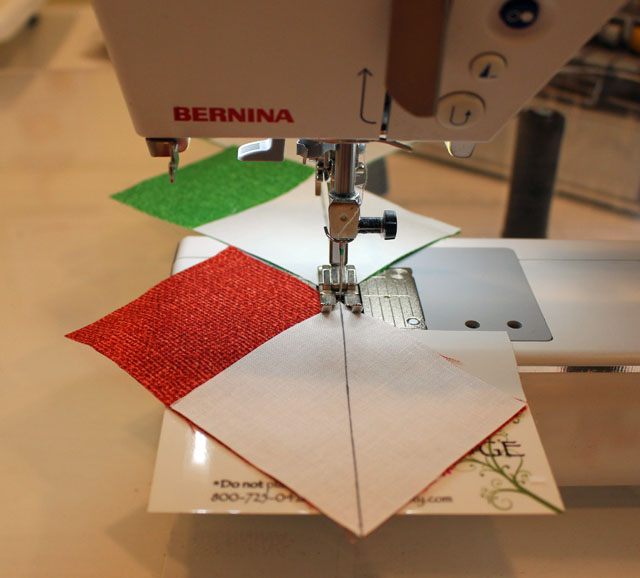
Make flying geese units.
- Draw a diagonal line on the wrong side of each 2 3/4" white square.
- Place a white square, right sides together onto one side of each 2 3/4" x 4 3/4" rectangle.
- Stitch on the diagonal line.
- Trim. Press toward the corner.
- Repeat for the opposite side.
You can chain piece them through to save time and thread:
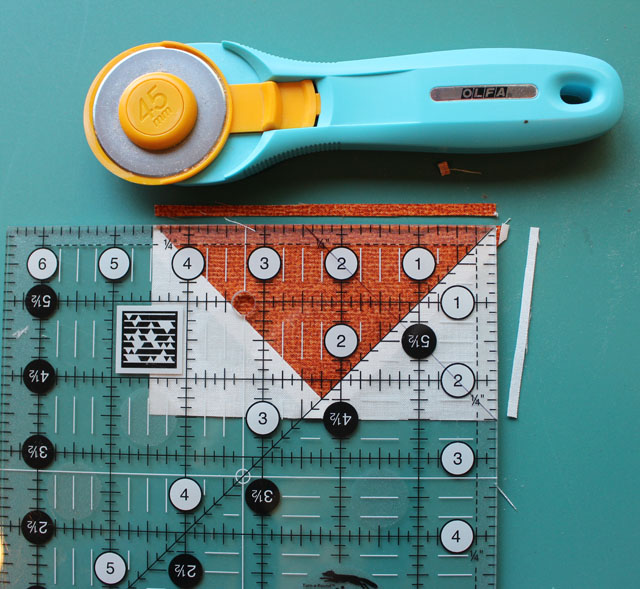
Trim the flying geese units to 2 1/2" x 4 1/2" rectangles.
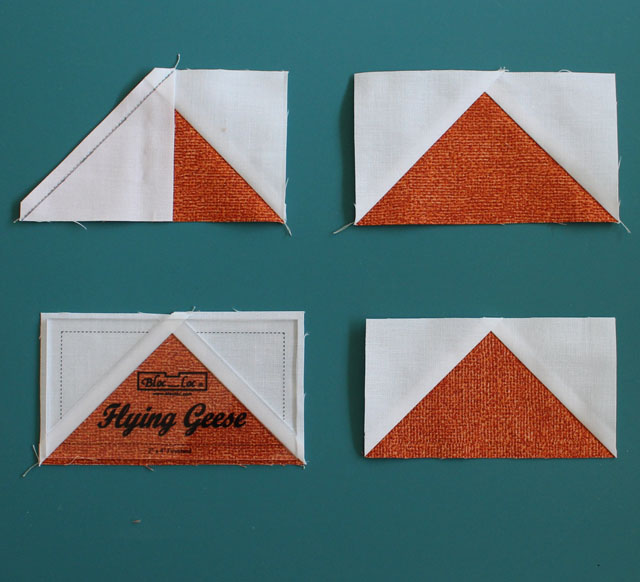
Let me show you how the Bloc Loc ruler works, and then I'll show you how to use a standard, square ruler to trim up your units. The Bloc Loc ruler has a groove on the back side that locks into place along the seam allowances. This allows for quick and easy placement of the ruler and accurate trimming of the first two sides (right and top).

Then, you rotate the unit around so that you can trim the remaining two sides as shown below:

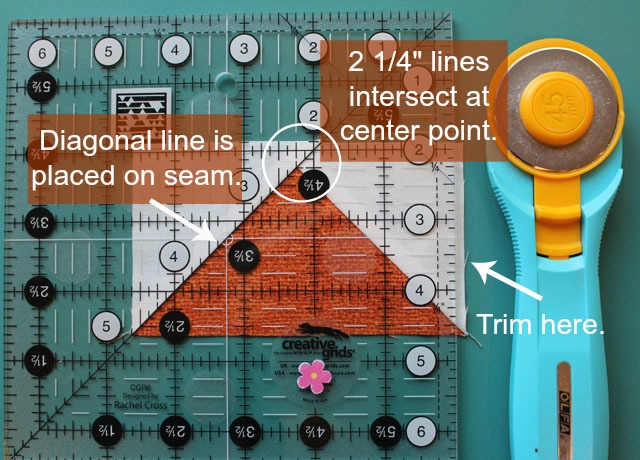
You can use a square ruler with a diagonal line to trim your flying geese units as well. You need to locate the 2 1/4" lines on the ruler. (This is the center of a 4 1/2" side). The 2 1/4" intersection on the ruler gets placed on the center point of the flying geese unit. The diagonal line of the ruler gets placed on the seam. Then you can trim the right edge.
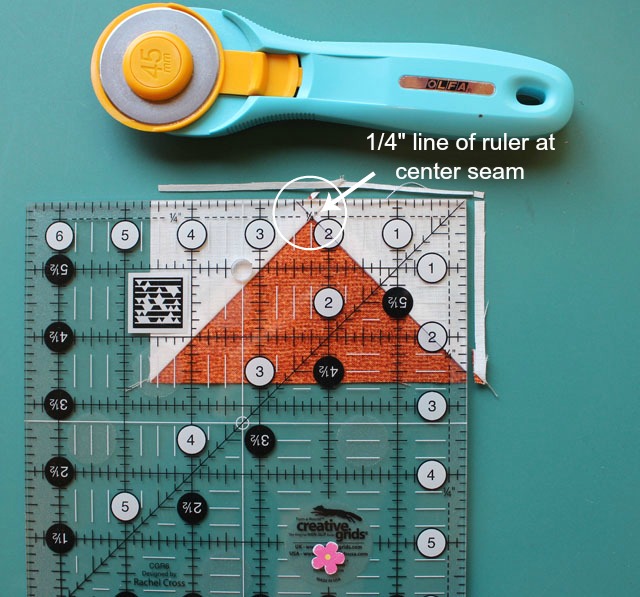
Next, trim the top edge by keeping the right edge of the ruler along the previously trimmed side and placing the 1/4" line of the ruler at the center seam of the unit. Trim along the top edge.
Now you rotate the flying geese unit around so that you can trim the remaining two sides. This time, line up the 2 1/2" and 4 1/2" lines of the ruler on the previously trimmed edges. Trim along the right side and upper edge.
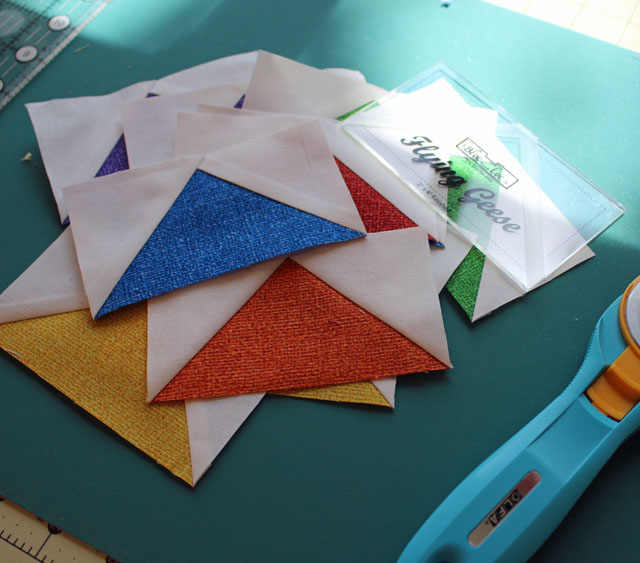
Make two flying geese units of each color: yellow, orange, red, purple, blue and green.
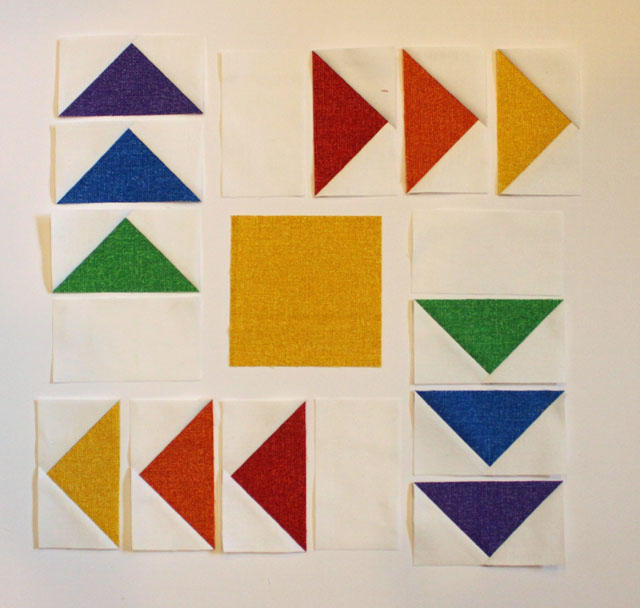
Assemble the block:
Place the 12 flying geese units, the 4 1/2" yellow square, and the (4) 2 1/2" x 4 1/2" white rectangles as shown below:
Stitch each unit into pairs; they should measure 4 1/2" square. Then stitch the pairs into three rows as shown below:
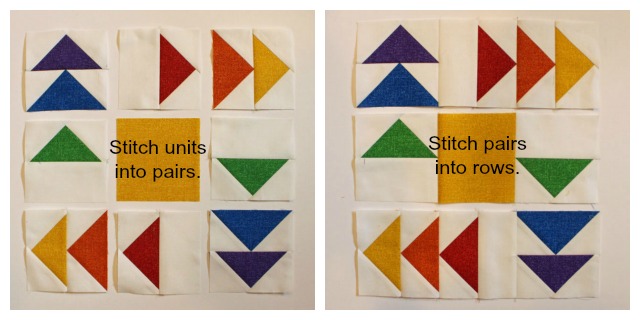
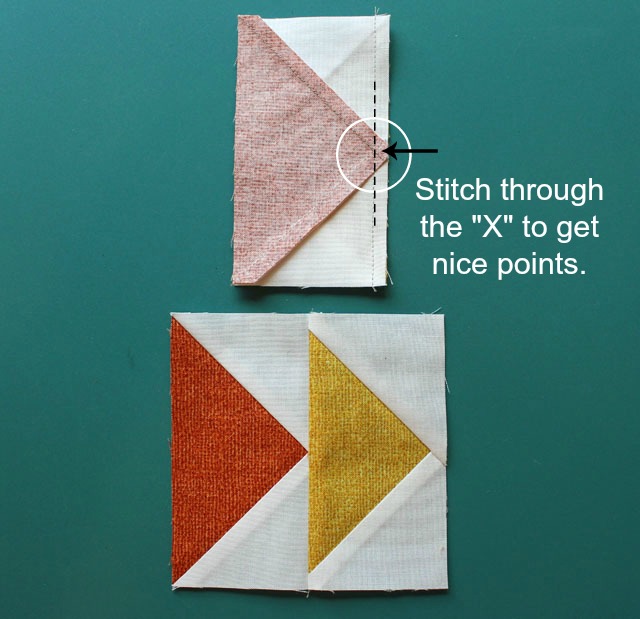
When you sew flying geese units together, make sure you stitch right through the center "X" or point. You'll make nice, sharp points that way!
Sew your rows together, matching seams. Press. Your block should measure 12 1/2" square.

Thanks Julie! Head over to The Crafty Quilter to enter to win a fat quarter bundle of the six Burlap Brights she used to make her block.
Make sure you check out each day's tutorial!
Day 1: Chris from made by ChrissieD
Day 2: Mary from Mary on Lake Pulaski
Day 3: Alison from Little Bunny Quilts
Day 4: Debby from Debby Kratovil Quilts
Day 6: Benartex design team
Day 7: Stephanie from Stitched Together Studios
Day 9: Cynthia from Quilting is more fun than Housework
Day 10: Jessica from Quilty Habit
Day 9: Cynthia from Quilting is more fun than Housework
Day 10: Jessica from Quilty Habit
To see the entire schedule, click here.
Love It? Share It!


Great block and the colors really pop. thanks
ReplyDeleteWhat an excellent tutorial for FG, and a fun block!
ReplyDeleteSusie
Love it!
ReplyDeleteBeautiful block.
ReplyDeleteWith a one-quarter rotation to each block, that would make a wonderful kids quilt and some dizzy geese! Very fun.
ReplyDeletethis is sooooo great. Thanks for the squaring up cutting instructions too
ReplyDeletePretty cool block
ReplyDeleteI love this block...also think I might need a Block Lock Ruler!!
ReplyDeleteI love this block...also think I might need a Block Lock Ruler!!
ReplyDeleteWhat a simple clean non-fussy block --I think it would make up very nicely into a quilt for a child-hmmmm I'm thinking Project Linus. It would be so cheerful!
ReplyDeleteLove the tutorial...this block really makes those colors pop....
ReplyDeleteThanks so much for the trimming tips on the flying geese...love the block!
ReplyDeleteGreat block. Love the colours and design.
ReplyDeletejudybarr at iearn dot org dot au
The Bloc Loc ruler looks like it reduces trimming time! I really like your block - bright, clear and organized!
ReplyDeleteAll of these blocks and the way the colors have been incorporated are fantastic
ReplyDelete